What if you created a certificate infrastructure, sized it according to the requirements known at the moment and a new project comes along that requires a certifcate services Database and log that is three times the size of the original one, so it doesn't fit onto your sized harddisk. In alot of scenario's it's possible to expand the disks (using vmware, xenserver or hyper-v this is quite easy), but when you're using physical servers it's not so easy.
Or, maybe, when you installed AD CS you forgot to move it from c:\windows\system32\Certsvc. No worries, it's quite easy to change it.
In this short blogpost I'll explain how to move the certificate services database and log location after AD Certificate Services has been installed.
1. Prepare the disk, LUN or whatever you have in mind for your database and log. Ideally both will be placed on separate disks for performance reasons. Create the path for the database and log. In case it'll be placed on one disk I always assume CertDB for the database and CertDB\Logs for the logs, to keep things tidy.
2. Stop the AD Certificate Services service by running net stop certsvc from an elevated command prompt or by right clicking and selecting Stop service in the Services MMC.
3. Copy the database and the logs to their new location.
4. Open the registry editor by starting regedit and browse to HKLM\System\CurrentControlSet\Services\CertSvc\Configuration.
5. Edit the following entries:
DBDirectory (default is C:\Windows\System32\CertLog\..., change it to your new databasedir)
DBLogDirectory (default is C:\Windows\System32\CertLog, change it to your new logdir)
DBSystemDirectory (default is C:\Windows\System32\CertLog, change it to your new databasedir)
DBTempDirectory (default is C:\Windows\System32\CertLog, change it to your new databasedir)
6. Start the certification authority again by running net start certsvc from the commandline or by right clicking the AD Certification Services service and choosing Start. From this moment your DB and log should be running from the new location.
7. Verify it is running from the new location. You can do this by opening up the certification authority MMC. Right click on the name of your CA and choose Properties. Choose the tab Storage. The tab should look like this, with the location of your DB and Logs on a perhaps different drive/letter.
Hope this helps.
Regards,
Stefan Hazenbroek
Posts tonen met het label Active Directory. Alle posts tonen
donderdag 13 januari 2011
maandag 5 juli 2010
Active Directory: Managed Service Accounts
Windows Server 2008 R2 introduces the new and nifty feature that's called "Managed Service Accounts". A Managed Service Account (from now on I'll call it a MSA) is an account that is tied to a specific computer (for example an IIS Server) and maintains it's own password and SPN's. I can't remember the number of times a service wouldn't start after a reboot of a server because the password for the service had changed but they forgot to change the password at all necessary places.
In this blogpost I will explain the following items:
A MSA depends on the object class msDS-ManagedServiceAccount, for which your schema needs to be at the level of Windows Server 2008 R2. Also, only Windows Server 2008 R2 and Windows 7 support MSA's.
MSA's update the password in the same way as a computer account updates it. By default, the password of a MSA gets updated when the computer account updates it's password. They don't listen to password policies and cannot be locked out or perform interactive logons.
By default all MSA's are created in the CN=Managed Service Accounts,DC=domain,DC=net. When using DSA.MSC and setting it to show "Advanced Features" also displays them.
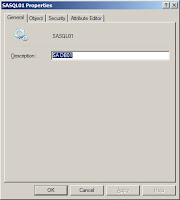
However, as you see when you open the properties of a MSA, there's nothing to be set apart from the description. This is because all administration of MSA's is done in Powershell.

MSA's automatically maintain their own SPN's but cannot be linked to multiple computers at a time or to a cluster node.
2. Implementation of MSA's For the sake of argument I'll assume you are creating a service account for use with SQL (although this isn't supported by SQL Server yet because of VSS Backups and such). Also, I will use the name SASQL02, but ofcourse you're free to change this to anything you want. For the servername I will use DB01.
At the moment it's not possible to create a MSA that's longer than 15 characters, so stay under this limitation (see http://derek858.blogspot.com/2010/02/server-2008-r2-managed-service-account.html for more information about this)
1. Open Powershell with the AD-Powershell modules loaded (Load this by using import-module ActiveDirectory within Powershell)
2. Create the MSA by using:
6. Install the MSA at the server by using:
7. Open up services.msc.
8. Browse to your service and double click on it.
9. Click the tab Log On.
In a later blogpost I will explain how MSA's are maintained through your environment. In the meantime also check out This post by Ned Pyle.
Regards,
Stefan HazenbroekNOTE: For some reason all images have gone byebye on me. I’ll repost them soon.
In this blogpost I will explain the following items:
- The requirements for MSA’s
- Implementation of MSA's
A MSA depends on the object class msDS-ManagedServiceAccount, for which your schema needs to be at the level of Windows Server 2008 R2. Also, only Windows Server 2008 R2 and Windows 7 support MSA's.
MSA's update the password in the same way as a computer account updates it. By default, the password of a MSA gets updated when the computer account updates it's password. They don't listen to password policies and cannot be locked out or perform interactive logons.
By default all MSA's are created in the CN=Managed Service Accounts,DC=domain,DC=net. When using DSA.MSC and setting it to show "Advanced Features" also displays them.
However, as you see when you open the properties of a MSA, there's nothing to be set apart from the description. This is because all administration of MSA's is done in Powershell.

MSA's automatically maintain their own SPN's but cannot be linked to multiple computers at a time or to a cluster node.
2. Implementation of MSA's For the sake of argument I'll assume you are creating a service account for use with SQL (although this isn't supported by SQL Server yet because of VSS Backups and such). Also, I will use the name SASQL02, but ofcourse you're free to change this to anything you want. For the servername I will use DB01.
At the moment it's not possible to create a MSA that's longer than 15 characters, so stay under this limitation (see http://derek858.blogspot.com/2010/02/server-2008-r2-managed-service-account.html for more information about this)
1. Open Powershell with the AD-Powershell modules loaded (Load this by using import-module ActiveDirectory within Powershell)
2. Create the MSA by using:
New-ADServiceAccount -Name SASQL02 -Enabled $True3. Now, associate the MSA to a computer account:
Add-ADComputerServiceAccount -Identity DB01 -ServiceAccount SASQL024. Logon to the server on which the MSA will be running (in my case DB01). It's necessary to have the following features enabled on the target server:
- Active Directory Module for Windows Powershell
- .NET Framework 3.5.1
6. Install the MSA at the server by using:
Install-ADServiceAccount -Identity SASQL02To install a MSA on a server you will need Local Administrator permissions on the target server and modify permissions on the MSA object in Active Directory.
7. Open up services.msc.
8. Browse to your service and double click on it.
9. Click the tab Log On.
10. Click Browse and type the name of the MSA.
11. The account name is filled in in the following screen. You can see it's a MSA by looking at the dollar sign ($) behind the account name. Also, it's very important that the password field remains empty!
12. Click OK and restart your service. After this moment it's no longer needed to manually change passwords, because your MSA will take care of this.
In a later blogpost I will explain how MSA's are maintained through your environment. In the meantime also check out This post by Ned Pyle.
Regards,
Stefan Hazenbroek
dinsdag 11 mei 2010
ConfigMgr: AD Permissions for Domain Join Account
It's a good practise to use a service account for any sort of automated task, and this is no different with SCCM Operating System Deployment.
SCCM OSD has the capability of automatically adding a workstation to the domain during the Task Sequence, so the amount of work that needs to be done by hand is kept to a bare minimum. You use a service account in SCCM that has the permissions to add the computer to the needed OU, but what permissions do you need exactly?
Well, at a minimum you'll need the following permissions:

I hope this helps, I know I'll be back when I need it set again :)
Regards,
Stefan Hazenbroek
SCCM OSD has the capability of automatically adding a workstation to the domain during the Task Sequence, so the amount of work that needs to be done by hand is kept to a bare minimum. You use a service account in SCCM that has the permissions to add the computer to the needed OU, but what permissions do you need exactly?
Well, at a minimum you'll need the following permissions:

I hope this helps, I know I'll be back when I need it set again :)
Regards,
Stefan Hazenbroek
dinsdag 12 januari 2010
AD Certificate Services: How To Install on Windows Server 2008 R2 Core
Windows Server 2008 R2 Core offers the possibility of installing a Certificate Authority. However, not much documentation is available on how to configure the role using the commandline.
In this blogpost I will explain how you can install the role and use it to issue certificates to your servers and clients.
Log in to the server (Windows Server 2008 R2 Server Core server) that you're going to install the Certification Authority on. You need Domain Admin or equivalent permissions on a single forest, single domain infrastructure or Enterprise Admins on a multi-domain infrastructure to be able to install AD Certificate Services correctly. The following command has to be issued on the commandline:
Instead, if you have powershell installed on your Windows Server 2008 R2 Core machine you can also use the following commands to install the role:
First, fire up powershell by typing powershell in the cmd screen. When Powershell is fired up type:
At the top of the screen you'll see the module being imported, when it's complete you have the possibility to use the CMDLets Add-WindowsFeature,Get-WindowsFeature and Remove-WindowsFeature. Install AD Certificate Services using the following command:
Restart the server when the installation is completed to be sure that all needed information is correctly populated and login to the server again.
Now, the nice folks over at the PKI blog published a nice article on how to use a VBScript to install a Certificate Authority. Check out:
Download the script from above link and place it somewhere you are able to access it from the machine the CA is running on. Browse to the directory you placed the script in and execute the following command to install an Enterprise Root Certification Authority:
When you've issued above script and it completed succesfully (it'll take about a minute or so) you will be able to start your CA. Go to the Windows 7 workstation with RSAT installed and open up Computer Management. Browse to the machine your CA is running on and fire up the service Active Directory Certificate Services. When running this from the commandline you issue the name CertSvc.
On the RSAT machine, open up the Certification Authority shortcut in the Administrative Tools folder. When you open this shortcut you'll receive the following error:
This is no problem. Click on OK and when in the MMC right click Certification Authority (Local). In the submenu you choose Retarget Certification Authority. Choose Another Computer in the wizard and fill in the hostname of the machine that is running your CA. From now on you can manage your Certification Authority from your machine with RSAT installed.
In this blogpost I will explain how you can install the role and use it to issue certificates to your servers and clients.
Log in to the server (Windows Server 2008 R2 Server Core server) that you're going to install the Certification Authority on. You need Domain Admin or equivalent permissions on a single forest, single domain infrastructure or Enterprise Admins on a multi-domain infrastructure to be able to install AD Certificate Services correctly. The following command has to be issued on the commandline:
Dism /online /enable-feature /featurename:CertificateServicesDon't forget, the DISM command is Case-Sensitive, so you should keep the Capitcal C and S in mind.
Instead, if you have powershell installed on your Windows Server 2008 R2 Core machine you can also use the following commands to install the role:
First, fire up powershell by typing powershell in the cmd screen. When Powershell is fired up type:
Import-Module ServerManager
At the top of the screen you'll see the module being imported, when it's complete you have the possibility to use the CMDLets Add-WindowsFeature,Get-WindowsFeature and Remove-WindowsFeature. Install AD Certificate Services using the following command:
Add-WindowsFeature ADCS-Cert-Authority
Restart the server when the installation is completed to be sure that all needed information is correctly populated and login to the server again.
Now, the nice folks over at the PKI blog published a nice article on how to use a VBScript to install a Certificate Authority. Check out:
http://blogs.technet.com/pki/archive/2009/09/18/automated-ca-installs-using-vb-script-on-windows-server-2008-and-2008r2.aspx
Download the script from above link and place it somewhere you are able to access it from the machine the CA is running on. Browse to the directory you placed the script in and execute the following command to install an Enterprise Root Certification Authority:
Cscript setupca.vbs /ie /sn NameOfYourCA /sk 4096 /sp "RSA#Microsoft Software Key Storage Provider" /sa SHA256
When you've issued above script and it completed succesfully (it'll take about a minute or so) you will be able to start your CA. Go to the Windows 7 workstation with RSAT installed and open up Computer Management. Browse to the machine your CA is running on and fire up the service Active Directory Certificate Services. When running this from the commandline you issue the name CertSvc.
On the RSAT machine, open up the Certification Authority shortcut in the Administrative Tools folder. When you open this shortcut you'll receive the following error:
This is no problem. Click on OK and when in the MMC right click Certification Authority (Local). In the submenu you choose Retarget Certification Authority. Choose Another Computer in the wizard and fill in the hostname of the machine that is running your CA. From now on you can manage your Certification Authority from your machine with RSAT installed.
zondag 22 november 2009
Active Directory: Corrupt Certificate Templates
I was trying to get my Windows Mobile 6.5 to work with Exchange 2010, but when I tried to request a certificate to my CA i got the following error:
Now what? For some reason it thinks my User certificate does not exist or something? It seemed the User Certificate Template on my CA was corrupt for some reason. This is how I fixed it.
1. Stop the Certificate Services Service.
2. Log in to ADSI Edit and open the Configuration naming context. Then go to CN=Services,CN=Public Key Services,CN=Certificate Templates. If all is correct there should be quite a few items listed there. Empty out the CN=Certificate Templates container. This is most easily done by deleting CN=Certificate Templates and recreating it with the same name.
3. Start the Certificate Services Service.
4. Open the Certification Authority Snap-In and go to Certificate Templates. You should see all templates listed with an X in front of it.
If this is the case, right-click on Certificate Templates and choose Manage. Windows should give a popup with a message like: "New certificate templates are found, would you like to install them?". Agree with the message and see the magic work. After a few moments (depending on the size of your AD) you'll be able to issue certificates again.
Eventid: 53, CertificationAuthority
Message: Active Directory Certificate Services denied request 17 because The requested certificate template is not supported by this CA. 0x80094800 (-2146875392). The request was for CN="". Additional information: Denied by Policy Module 0x80094800, The request was for a certificate template that is not supported by the Active Directory Certificate Services policy: User.
Now what? For some reason it thinks my User certificate does not exist or something? It seemed the User Certificate Template on my CA was corrupt for some reason. This is how I fixed it.
Note: I assume you backup your CA before changing settings, because of this I'll not mention it in the Howto.
1. Stop the Certificate Services Service.
net stop CertSvc
2. Log in to ADSI Edit and open the Configuration naming context. Then go to CN=Services,CN=Public Key Services,CN=Certificate Templates. If all is correct there should be quite a few items listed there. Empty out the CN=Certificate Templates container. This is most easily done by deleting CN=Certificate Templates and recreating it with the same name.
3. Start the Certificate Services Service.
net start CertSvc
4. Open the Certification Authority Snap-In and go to Certificate Templates. You should see all templates listed with an X in front of it.
If this is the case, right-click on Certificate Templates and choose Manage. Windows should give a popup with a message like: "New certificate templates are found, would you like to install them?". Agree with the message and see the magic work. After a few moments (depending on the size of your AD) you'll be able to issue certificates again.
zaterdag 10 oktober 2009
Active Directory: AD Recycle Bin GUI
Earlier on I blogged about the AD Recycle Bin. In this blog we checked out how the AD Recycle Bin is activated and how it's used through Powershell or LDP.
The fellows at Overall Solutions Inc. made a very nice GUI. In this GUI it's possible to see which items are deleted and also recover the deleted items.
The download can be found http://www.overall.ca/index.php?option=com_content&view=article&id=40:adrecyclebin&catid=15:adrecyclebinexe&Itemid=64
The GUI is built like this:
The fellows at Overall Solutions Inc. made a very nice GUI. In this GUI it's possible to see which items are deleted and also recover the deleted items.
The download can be found http://www.overall.ca/index.php?option=com_content&view=article&id=40:adrecyclebin&catid=15:adrecyclebinexe&Itemid=64
The GUI is built like this:
maandag 5 oktober 2009
Active Directory: FSMO Roles in Windows Server 2008 R2
I've been getting alot of questions and debate about FSMO roles in an Active Directory domain environment. Where should you place what role? What does a specific role do? Should I seize it if it's not available?
I'll start by summing up the available roles and their task. The function of each role is defined for Windows Server 2008 R2.
Schema Master
There can only be one Schema Master defined per forest. The Schema Master contains the only writable copy of the schema and additions to it can only be done by a member of the Schema Admins and the Enterprise Admins security group.
When this role is unavailable additions or changes to the schema cannot be made.
Domain Naming Master
The Domain Naming Master is responsible for the addition or removal of domains in the forest. The Domain Naming Master is a forest-wide role, which means only one can be defined per forest.
When this role is unavailable no domains can be added, removed or renamed.
Infrastructure Master
The Infrastructure Master is a domain-wide role, which means it is defined per domain. Logically, if you have 3 domains within your forest, you have 3 domain controllers that contain the Infrastructure Master role. The Infrastructure Master is responsible for updating links to objects in the domain to objects in other domains. There can only be one defined per domain.
When the infrastructure master is unavailable changes in objects do not get replicated. However, when all domain controllers are also a Global Catalog, the Infrastructure Master does not have a function.
RID Master
The RID (or Relative-ID) Master is responsible for RID-requests from all domain controllers within that domain. When the RID pool of a domain controller depletes, it requests a new pool from the RID Master. The RID Master can only be defined once per domain.
When the RID Master is unavailable and a domain controller runs out of available RID's no new objects (as users, groups, computers and such) cannot be created.
PDC Emulator
The PDC (or Primary Domain Controller) Emulator role is used to act as PDC when Windows NT BDC's are used. The PDC Emulator also acts as Master Browser for the domain and handles password updates for the domain. The PDC Emulator can only be defined once per domain.
When the PDC Emulator is unavailable password-changes get updated with the regular replication traffic instead of right away through the PDC emulator. Also, the time (net time) will not get synced during this time, which can be an issue in a domain environment.
Now, what if a domain controller is unavailable for a while and you need to seize the role? In a pre-windows 2008 R2 environment, thus: in an environment without the use of AD Powershell this can be quite the hassle. When you need to move the Schema Master you first have to load the dll for the mmc, after which you can move it. It just costs needless time.
For example, when you want to move the Infrastructure Master to domain controller "DC001" you'll use:
Now, if the server that contains the role is unavailable you can ofcourse Seize it. This can also be done in Powershell, by adding the -Force parameter to the CMDLet. In case of seizing the Infrastructure Master to domain controller DC001 you'll use:
Finally, one shell to manage your complete AD in!
Regards,
Stefan Hazenbroek
I'll start by summing up the available roles and their task. The function of each role is defined for Windows Server 2008 R2.
Schema Master
There can only be one Schema Master defined per forest. The Schema Master contains the only writable copy of the schema and additions to it can only be done by a member of the Schema Admins and the Enterprise Admins security group.
When this role is unavailable additions or changes to the schema cannot be made.
Domain Naming Master
The Domain Naming Master is responsible for the addition or removal of domains in the forest. The Domain Naming Master is a forest-wide role, which means only one can be defined per forest.
When this role is unavailable no domains can be added, removed or renamed.
Infrastructure Master
The Infrastructure Master is a domain-wide role, which means it is defined per domain. Logically, if you have 3 domains within your forest, you have 3 domain controllers that contain the Infrastructure Master role. The Infrastructure Master is responsible for updating links to objects in the domain to objects in other domains. There can only be one defined per domain.
When the infrastructure master is unavailable changes in objects do not get replicated. However, when all domain controllers are also a Global Catalog, the Infrastructure Master does not have a function.
RID Master
The RID (or Relative-ID) Master is responsible for RID-requests from all domain controllers within that domain. When the RID pool of a domain controller depletes, it requests a new pool from the RID Master. The RID Master can only be defined once per domain.
When the RID Master is unavailable and a domain controller runs out of available RID's no new objects (as users, groups, computers and such) cannot be created.
PDC Emulator
The PDC (or Primary Domain Controller) Emulator role is used to act as PDC when Windows NT BDC's are used. The PDC Emulator also acts as Master Browser for the domain and handles password updates for the domain. The PDC Emulator can only be defined once per domain.
When the PDC Emulator is unavailable password-changes get updated with the regular replication traffic instead of right away through the PDC emulator. Also, the time (net time) will not get synced during this time, which can be an issue in a domain environment.
Now, what if a domain controller is unavailable for a while and you need to seize the role? In a pre-windows 2008 R2 environment, thus: in an environment without the use of AD Powershell this can be quite the hassle. When you need to move the Schema Master you first have to load the dll for the mmc, after which you can move it. It just costs needless time.
Move-ADDirectoryServerOperationMasterRole -Identity ADDirectoryServer -OperationMasterRole ADOperationMasterRole []
For example, when you want to move the Infrastructure Master to domain controller "DC001" you'll use:
Move-ADDirectoryServerOperationMasterRole -Identity DC001 -OperationMasterRole InfrastructureMaster
Now, if the server that contains the role is unavailable you can ofcourse Seize it. This can also be done in Powershell, by adding the -Force parameter to the CMDLet. In case of seizing the Infrastructure Master to domain controller DC001 you'll use:
Move-ADDirectoryServerOperationMasterRole -Identity DC001 -OperationMasterRole InfrastructureMaster -Force
Finally, one shell to manage your complete AD in!
Regards,
Stefan Hazenbroek
zondag 6 september 2009
Active Directory: Configure AD Recycle Bin
Every Active Directory manager deals with it eventually, a user, a group of users or even an OU gets deleted by accident. Retrieving the objects using an authorative restore isn't the nicest job to do, because a lot of fields are stripped out when the account is deleted.
Windows Server 2008 R2 has a solution for this, namely the Active Directory Recycle Bin. In this blogpost I will explain how you setup the AD Recycle bin and how you can retrieve items afterwards. One drawback though: There is no nice interface available from Microsoft yet.
First off, it's necessary that the Forest Functional Level is at the level of Windows Server 2008 R2. This can be done using Active Directory Domains and Trusts, but can easily be done using Powershell.
Through Active Directory Domains and Trusts:
Through Powershell:
Navigate to the CN=Partitions container, rightclick this and choose Modify
Make sure the field DN is empty and fill in the following in the other two fields:
Edit Entry Attribute
Open up LDP again and connect and bind to the DC hosting the root domain. Click Options and choose Controls in the menubar.
When this is loaded up in choose View and Tree and choose the BaseDN of the Forest, in my case DC=domain,DC=test. When you look at the left side, you'll see the CN CN=Deleted Objects,DC=domain,DC=test. When you doubleclick this a list with all deleted users opens up at the left side. When you find the user you are looking for rightclick the user and choose Modify. Make sure the popupscreen looks like the following screen:
Afterwards choose Run and the object will be retrieved from the Recycle Bin, after which you can see this in Active Directory Users and Computers again.
Through Powershell:
I know what you're thinking. We have an awesome tool called Powershell, why won't we use that? Well, that's what we're going to look at now. Because we enabled the optional feature using Enable-ADOptionalFeature we have access to the Restore-ADObject CMDLet. What if, you know the username of the user you want to recover. You can see this by running the following CMDLet:
If this is the account you want to recover run the following CMDLet:
For more information about retrieving objects from the Recycle Bin please look at the following link:
Windows Server 2008 R2 has a solution for this, namely the Active Directory Recycle Bin. In this blogpost I will explain how you setup the AD Recycle bin and how you can retrieve items afterwards. One drawback though: There is no nice interface available from Microsoft yet.
First off, it's necessary that the Forest Functional Level is at the level of Windows Server 2008 R2. This can be done using Active Directory Domains and Trusts, but can easily be done using Powershell.
Through Active Directory Domains and Trusts:
Through Powershell:
Set-ADForestMode -Identity domain.test -ForestMode Windows2008R2ForestNow that the Forest is at the right level we'll start by configuring the AD Recycle Bin. First off we load the optional module in Powershell by using the following command.
Enable-ADOptionalFeature –Identity ‘CN=Recycle Bin Feature,CN=Optional Features,CN=Directory Service,CN=Windows NT,CN=Services,CN=Configuration, DC=domain,DC=test’ –Scope ForestOrConfigurationSet –Target ‘domain.test’When this is done we need to make the forest aware the optional feature is installed. This can be done using LDP. Fire up LDP using Run and type: ldp.exe. Open LDP and connect to the domain controller that hosts the root domain (so the firest domain). This can be done by clicking Connection then choosing Connect and typing in the hostname of the DC you want to connect to, after which you choose Bind. In the menu bar open the menu View and choose Tree. In the popupbox choose Configuration BaseDN
Navigate to the CN=Partitions container, rightclick this and choose Modify
Make sure the field DN is empty and fill in the following in the other two fields:
Edit Entry Attribute
enableOptionalFeatureValues
CN=Partitions,CN=Configuration,DC=domain,DC=test:766ddcd8-acd0-445e-f3b9-a7f9b6744f2aIn the field Operation choose Add and click Enter. The extension will now appear in the field Entry List. At the bottom of the popup box choose Run and then choose Close. When you doubleclick on CN=Partitions at the left side the following appears in the details field at the right side.
msDS-Behavior-Version: 4 = ( WIN2008R2 );If this is the case the Recycle Bin is installed correctly and we can start using it.
msDS-EnabledFeature: CN=Recycle Bin Feature,CN=Optional Features,CN=Directory Service,CN=Windows NT,CN=Services,CN=Configuration,DC=domain,DC=test;
name: Partitions;
ATTENTION! From this moment on the Recycle Bin feature is activated. Any user deleted before this action cannot be retrieved using the AD Recycle Bin.Through LDP:
Open up LDP again and connect and bind to the DC hosting the root domain. Click Options and choose Controls in the menubar.
Afterwards choose Run and the object will be retrieved from the Recycle Bin, after which you can see this in Active Directory Users and Computers again.
Through Powershell:
I know what you're thinking. We have an awesome tool called Powershell, why won't we use that? Well, that's what we're going to look at now. Because we enabled the optional feature using Enable-ADOptionalFeature we have access to the Restore-ADObject CMDLet. What if, you know the username of the user you want to recover. You can see this by running the following CMDLet:
Get-ADObject -Filter {sAMAccountname -eq "test"} -IncludeDeletedObjectsWhen this is executed the output will be as following:
If this is the account you want to recover run the following CMDLet:
Get-ADObject -Filter {sAMAccountname -eq "test"} -IncludeDeletedObjects | Restore-ADObjectThat's it, the filter can be adapted to about anything you're comfortable with using Powershell. In a later blog post I'll post more information about retrieving objects or OU's.
For more information about retrieving objects from the Recycle Bin please look at the following link:
http://technet.microsoft.com/en-us/library/dd379509(WS.10).aspx
Abonneren op:
Posts (Atom)